Using Arduino C and Processing Java
Just as programming with an Arduino is incredibly similar to programming with Processing, the two IDE's can communicate with each other easily as well.
|
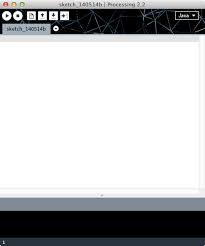
Processing 3 IDE Window
Control Buttons Across Top:
|
|
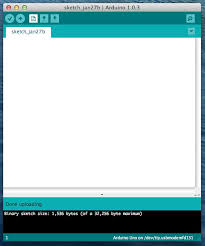
Arduino IDE Window
Control Buttons Across Top:
|
|
Both the Arduino and Processing have the ability to "talk" through serial communication. It's possible therefore to run a sketch in Arduino that can affect the output of a Processing sketch or vice versa. The following example demonstrates the basic serial communication concept. The only thing extra that you will need is a standard USB A-B cable!
Key Concepts
Serial Communication and Importing Libraries
Both the Arduino and Processing can communicate through a serial USB port as long as they are communicating at the same rate (i.e. Baud or "bits" per second). The key is that both IDE's must have the serial communication library installed in order to access serial communication.
Both the Arduino and Processing can communicate through a serial USB port as long as they are communicating at the same rate (i.e. Baud or "bits" per second). The key is that both IDE's must have the serial communication library installed in order to access serial communication.
|
Arduino IDE
On the right is a simple sketch that allows an Arduino to communicate. The speed of communication is 9600 Baud or 9600 bits (1's and 0's) per second. If we use the Arduino to read data using either digitalRead(6); or analogRead(A0); then we can transmit that data, in this case a digital signal of HIGH (or +5V) or LOW (ground) from digital pin 6, or an analog signal between 0V and +5V through the analog pin A0. The command to transmit that data is Serial.println(whatever the sensorValue happens to be); |
void setup() { Serial.begin(9600); } void loop() { Serial.println(sensorValue); } |
Below is an example of Arduino code that can read and transmit analog data read from the analog pin A0 using analogRead(A0);
If you upload this sketch to an Arduino with a potentiometer connected to analog pin A0, you can monitor the value (between 0 and 1023) of that pin by clicking the "Serial Monitor Button" at the top right corner of the Arduino IDE window.
| ||
Processing IDE
Using serial communication in a Processing sketch requires you to import the serial library using the import processing.serial.*; command at the top of your sketch. You may need to add the serial library under the "tools" menu. You will need a special "void" in you sketch called void serialEvent( ) that allows Processing to read available serial data. I've included an example of such a void from the Arduino and Processing discussion page https://discourse.processing.org/t/use-the-arduino-processing-interface/9409/3 however something similar can be easily found on the web by simply searching "arduino processing serial communication."
Using serial communication in a Processing sketch requires you to import the serial library using the import processing.serial.*; command at the top of your sketch. You may need to add the serial library under the "tools" menu. You will need a special "void" in you sketch called void serialEvent( ) that allows Processing to read available serial data. I've included an example of such a void from the Arduino and Processing discussion page https://discourse.processing.org/t/use-the-arduino-processing-interface/9409/3 however something similar can be easily found on the web by simply searching "arduino processing serial communication."
|
The link to the right is a simple sketch that uses the void serialEvent( ) found on the discussion page mentioned above. This sketch outputs the value of a potentiometer connected to analog pin A0 on an Arduino and is connected to the computer via USB. The sketch is also shown below.
Note: The serial monitor window must be closed for Processing to communicate with the Arduino. |
| ||
|
|
//Arduino Sensor Value
//the "void serialEvent" is from https://discourse.processing.org/t/use-the-arduino-processing-interface/9409/3 //Mr. H. import processing.serial.*; Serial myPort; int sensorValue = 0; void setup(){ size(600,600); printArray(Serial.list()); myPort = new Serial(this, Serial.list()[3], 9600); myPort.bufferUntil('\n'); } void draw(){ background(255); fill(0); textSize(28); textAlign(CENTER); text("Sensor Value = " + sensorValue, width/2, height/2); } // serialEvent method is run automatically by the Processing applet void serialEvent(Serial myPort) { // read the serial buffer: String myString = myPort.readStringUntil('\n'); myString = trim(myString); println(myString); int values[] = int(split(myString, ',')); if (values.length > 0) { sensorValue = values[0]; } } |
Here are some additional resources to help you get started.
Select any of the links below to check out the following microprocessor platforms and electronics suppliers.


Recommended Device: Laptops work best
